> ## Documentation Index
> Fetch the complete documentation index at: https://docs.hel.io/llms.txt
> Use this file to discover all available pages before exploring further.
# Stripe
> MoonPay Commerce lets you manage on-chain payments through Stripe
You can use MoonPay Commerce alongside Stripe to manage on-chain payments for one-time payments and invoices.
## How It Works
Within Stripe, you can use a Restricted API key to mark invoices as paid when payments occur on-chain. This ensures that all on-chain payments are properly reflected in the Stripe dashboard, allowing you to view and manage your full payment history in one place.
This Restricted API Key allows us to:
* Link your Stripe account and enable Stripe functionality on MoonPay Commerce Pay Links
* Reference Stripe invoices and create charges using Invoice IDs
* Have completed crypto payments automatically reflected in the Stripe Dashboard
## How to Get Started
1. **Set up Stripe**
* Create a Stripe account, if you don’t already have one.
* Navigate to **Developers → API Keys** in the Stripe Dashboard and click **Create restricted key**.
* Select the option **“Providing this key to another website.”**
* Enter a name for the key (e.g., MoonPay Commerce) and click **Create key**.
2. **Set up the Integration in MoonPay Commerce**
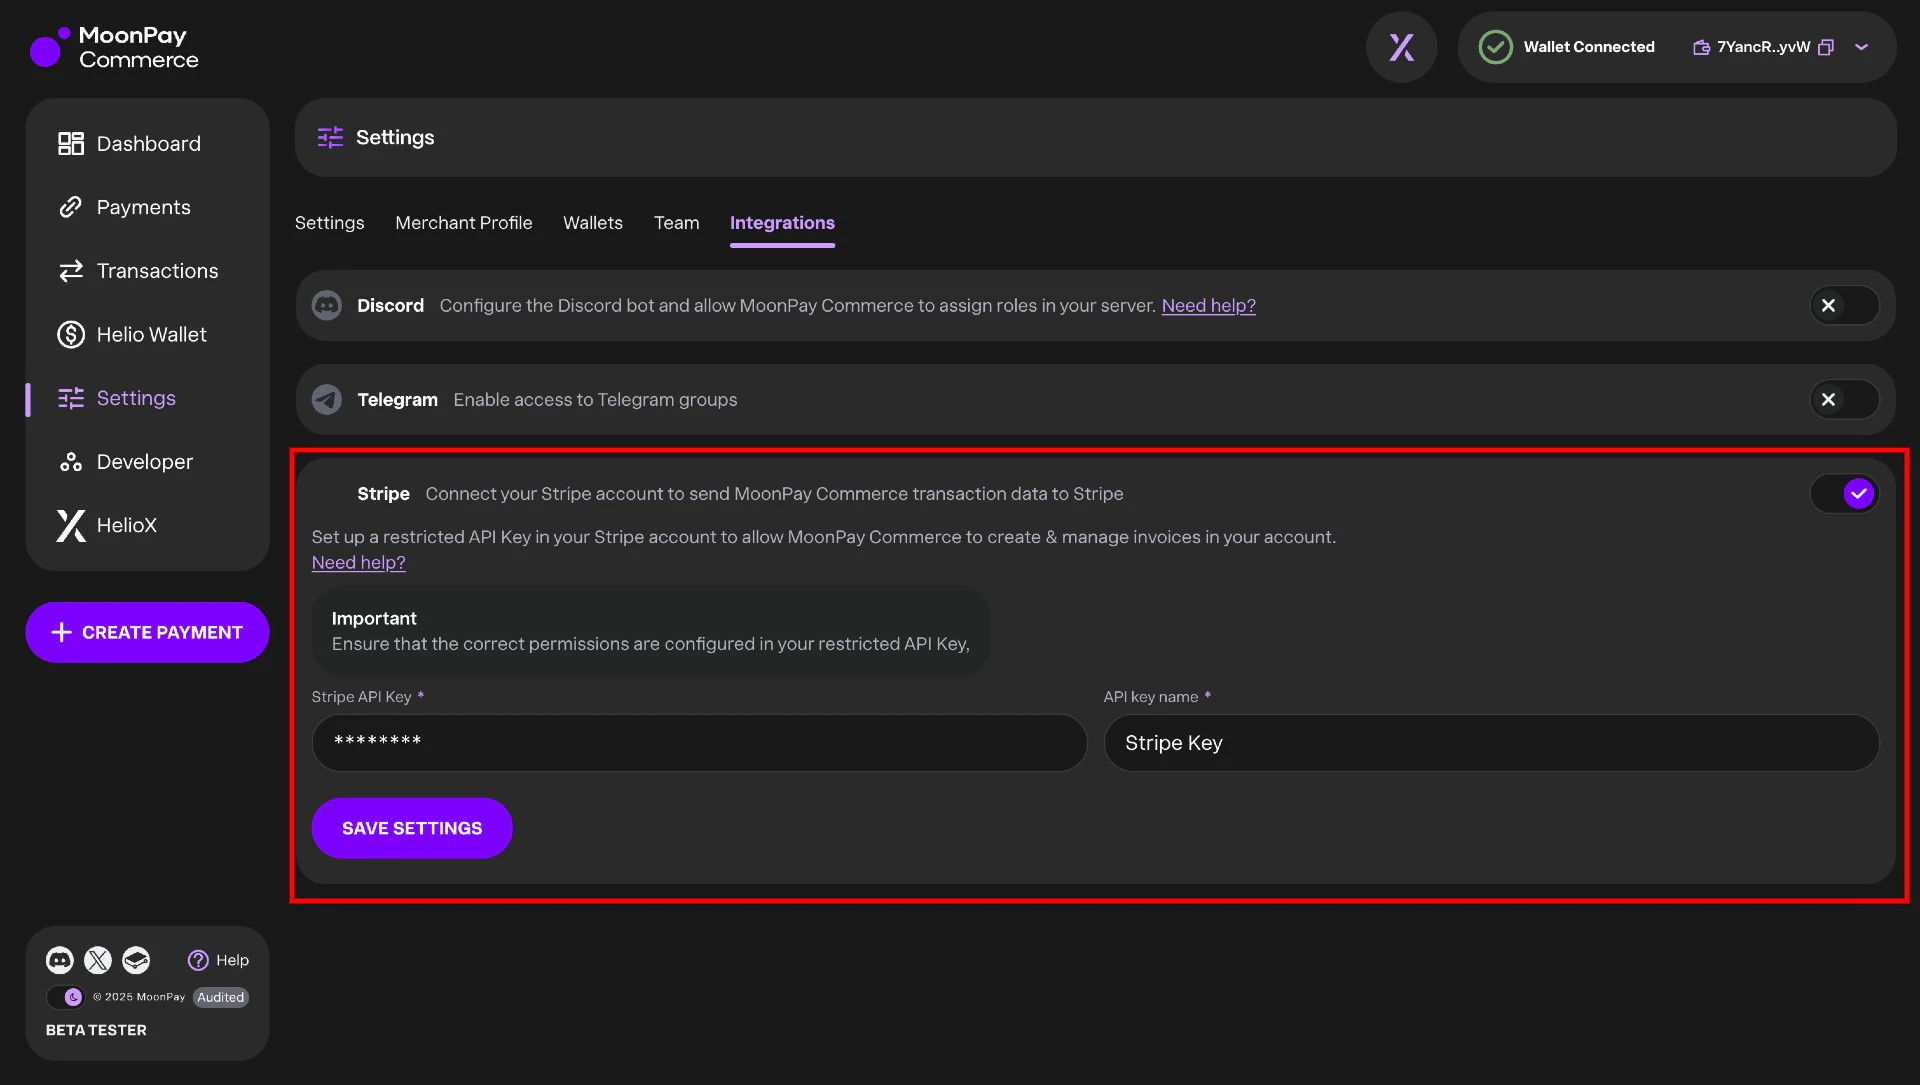
* In the MoonPay Commerce Dashboard, go to **Settings → Integrations**.
* Enter the Stripe Restricted API Key you generated and assign it a name.
 3. **Create a Stripe-Enabled Pay Link in MoonPay Commerce**
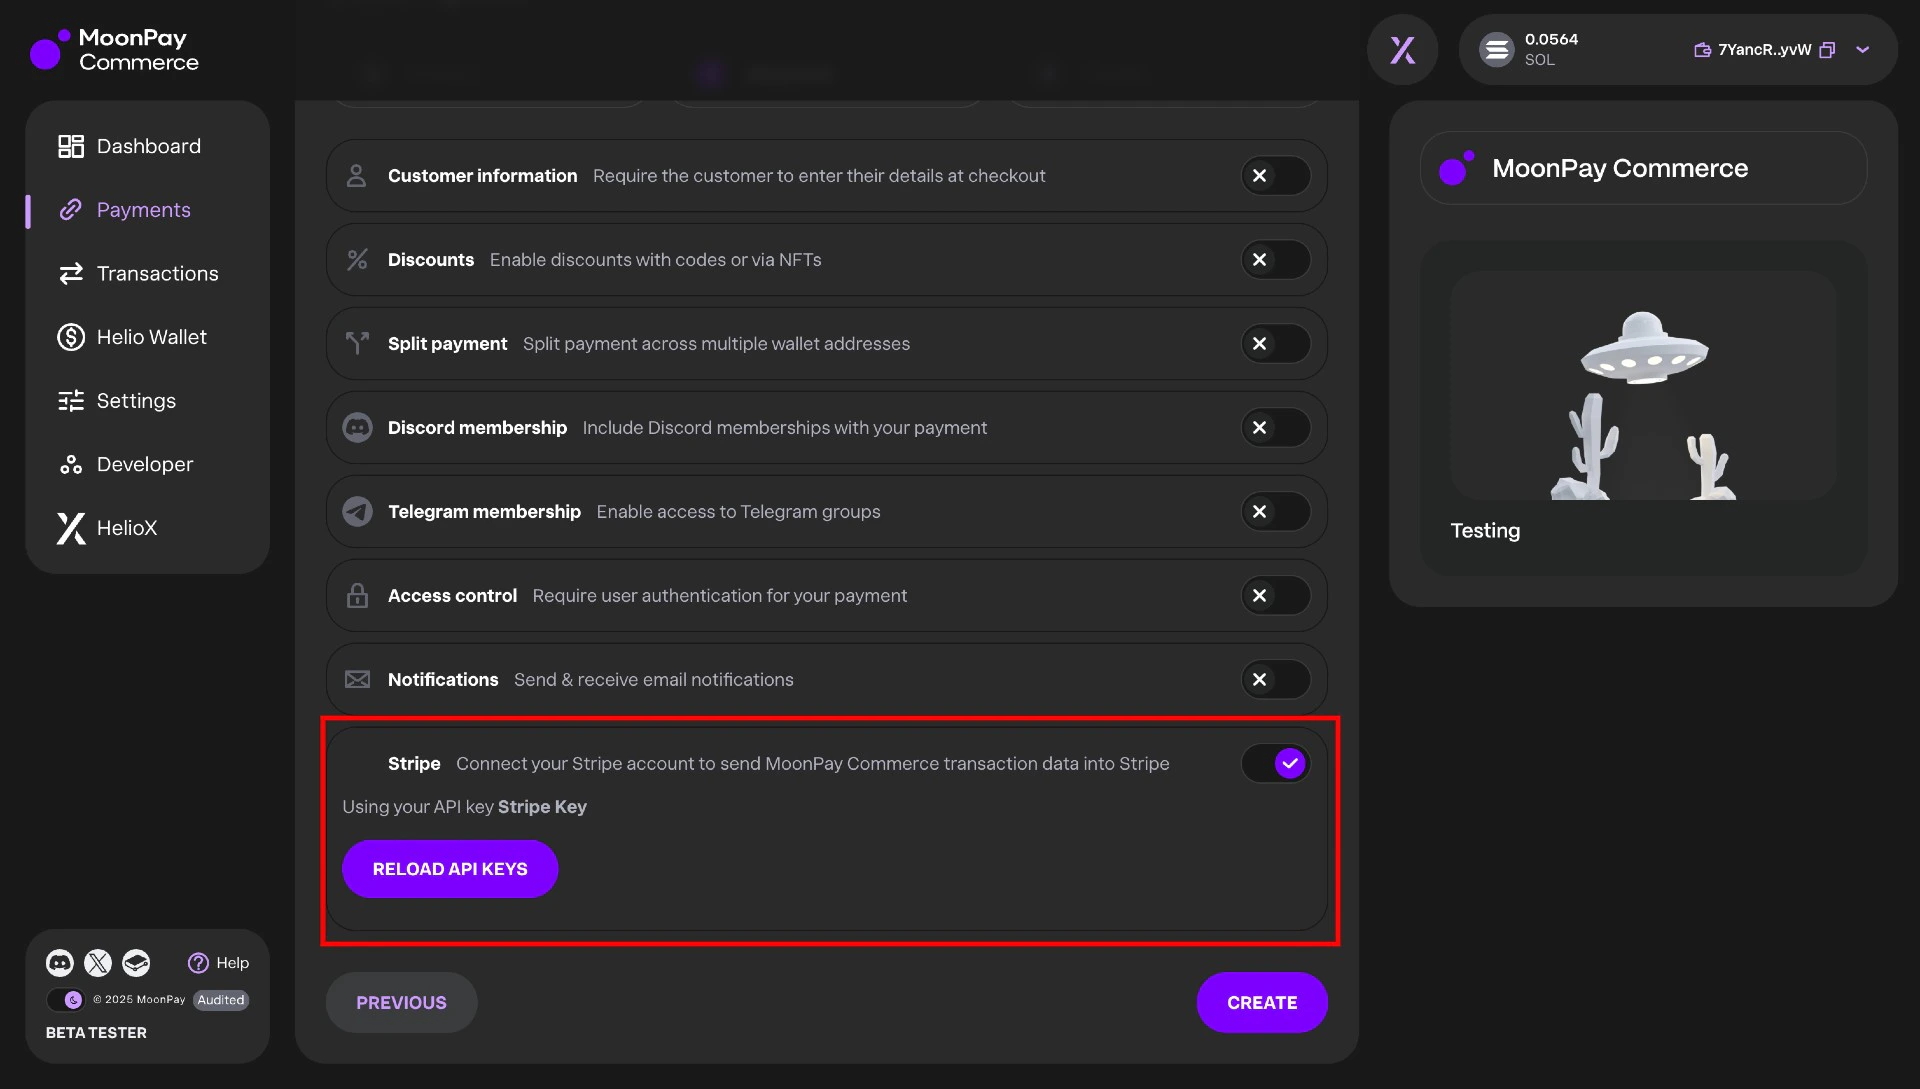
* In the **MoonPay Commerce Dashboard**, create a new **Pay Link**. Make sure the Pay Link is set up as a **one-time payment** (not a subscription) and configured as [**dynamic**](https://docs.hel.io/docs/for-developers#payment-integration-options).
* In **Step 2: Advanced**, enable Stripe functionality and select the Restricted Key you configured.
3. **Create a Stripe-Enabled Pay Link in MoonPay Commerce**
* In the **MoonPay Commerce Dashboard**, create a new **Pay Link**. Make sure the Pay Link is set up as a **one-time payment** (not a subscription) and configured as [**dynamic**](https://docs.hel.io/docs/for-developers#payment-integration-options).
* In **Step 2: Advanced**, enable Stripe functionality and select the Restricted Key you configured.
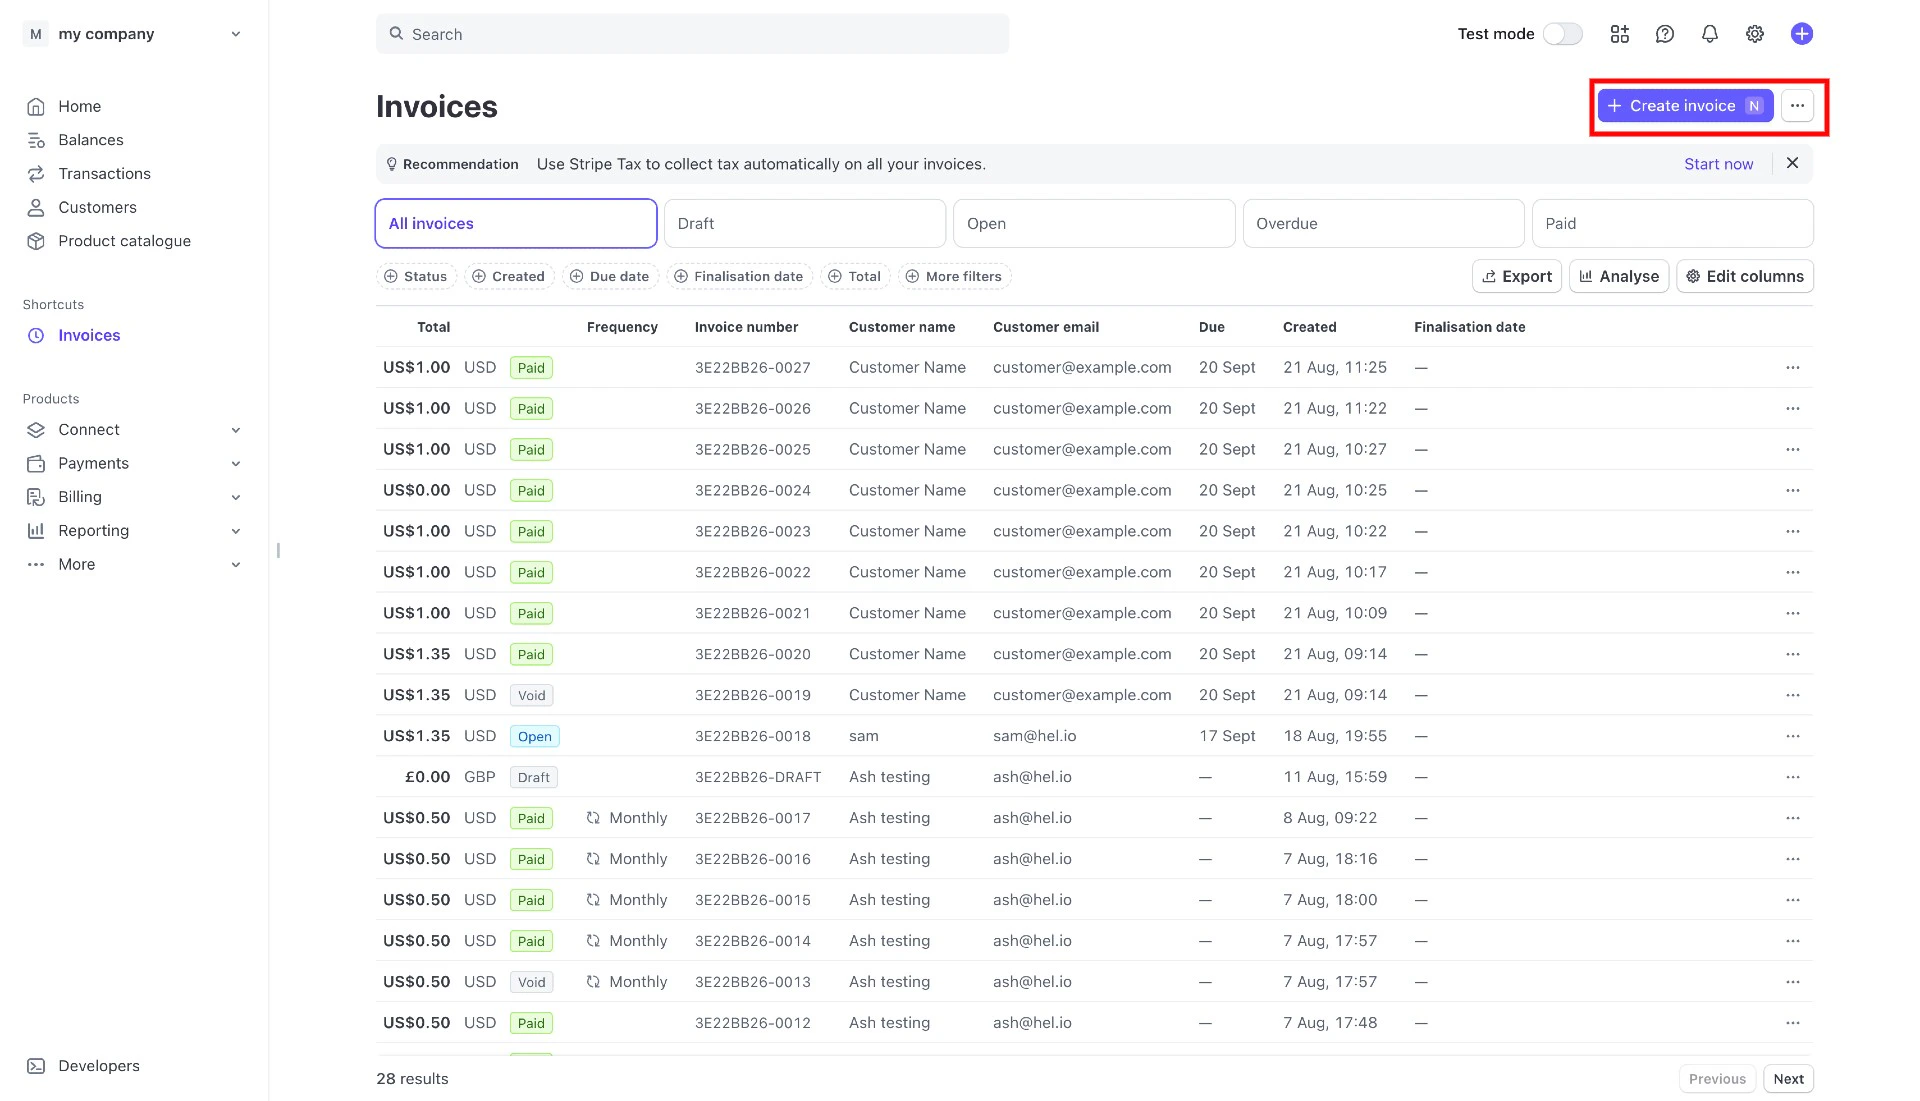
 4. **Create an unpaid invoice (same currency as the MoonPay Commerce Pay Link) within the Stripe.**
* Within Stripe, create an unpaid invoice in the same currency as the MoonPay Commerce Pay Link. This can be done either via the Stripe API using this [endpoint](https://docs.stripe.com/api/invoices/object) or directly within the Dashboard.
4. **Create an unpaid invoice (same currency as the MoonPay Commerce Pay Link) within the Stripe.**
* Within Stripe, create an unpaid invoice in the same currency as the MoonPay Commerce Pay Link. This can be done either via the Stripe API using this [endpoint](https://docs.stripe.com/api/invoices/object) or directly within the Dashboard.
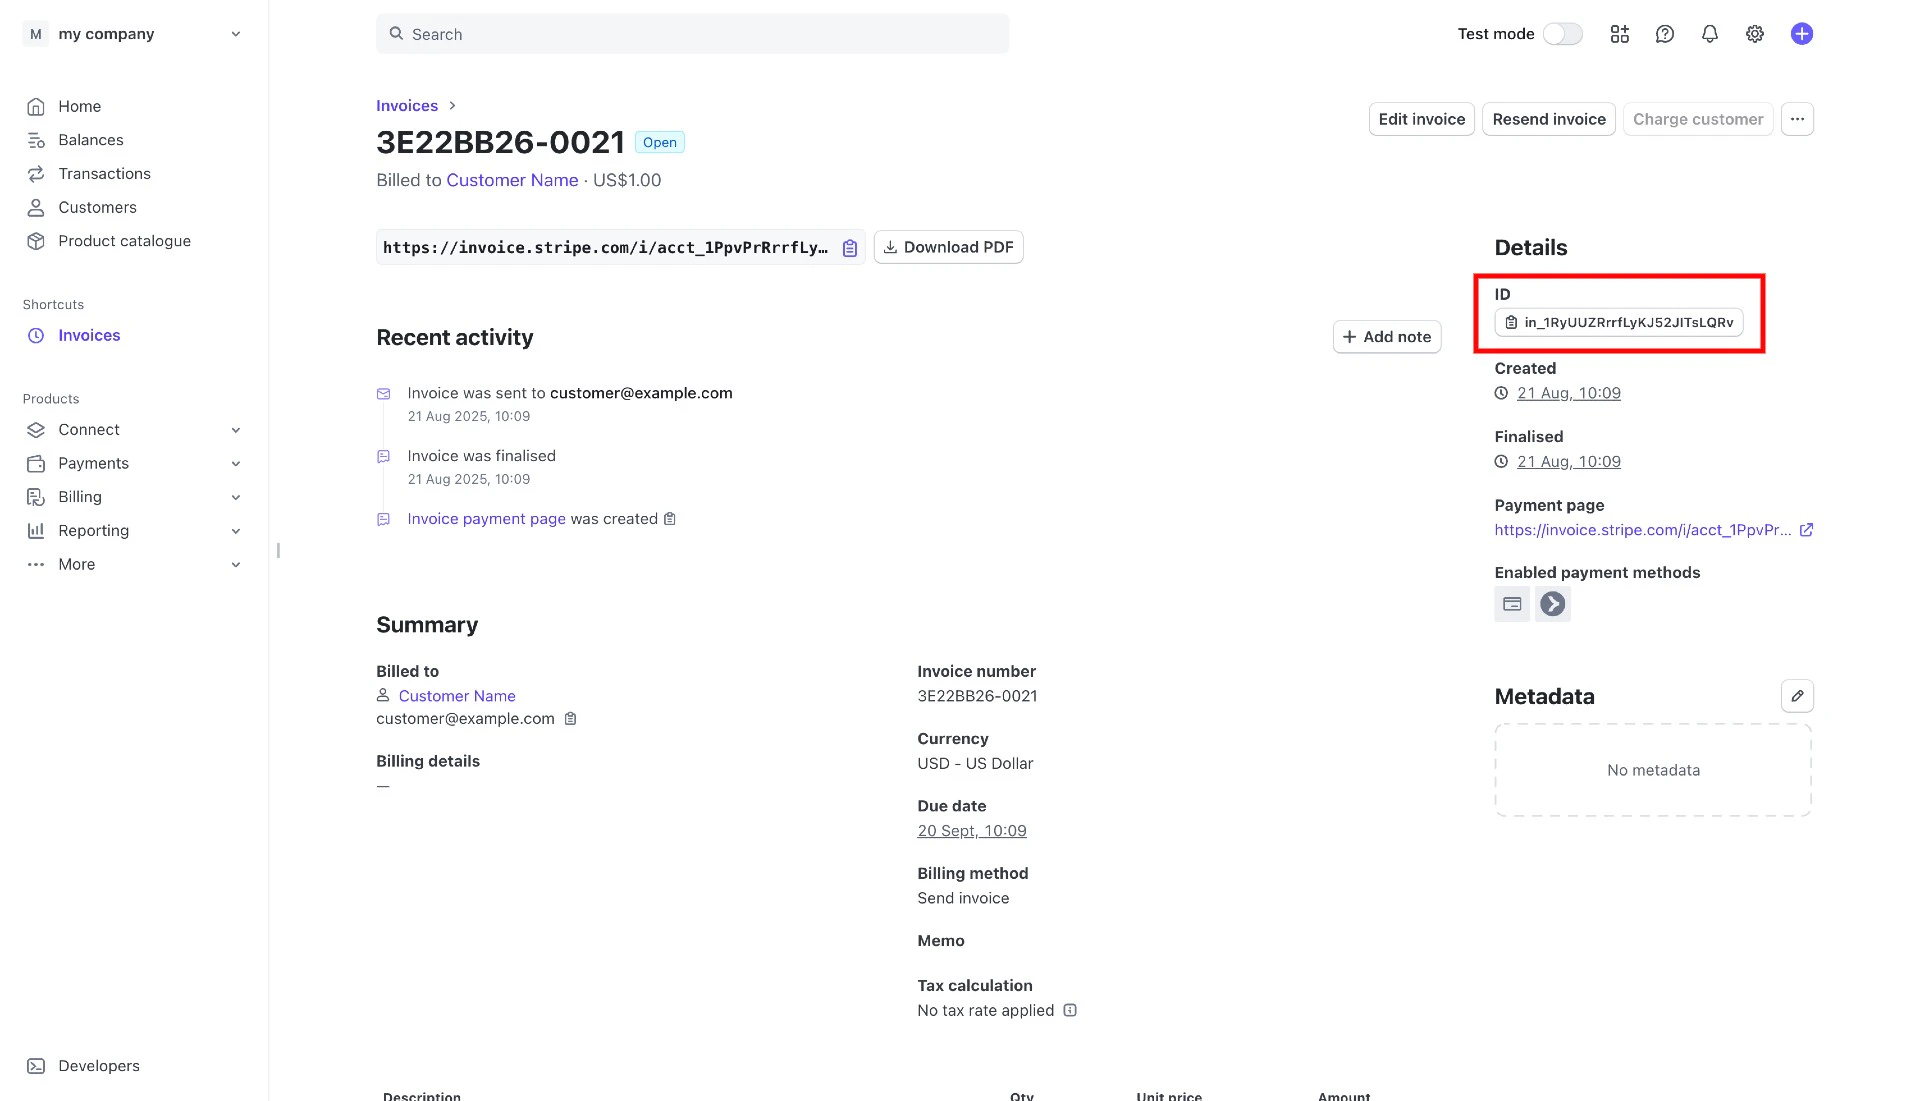
 5. **Create a charge using the Stripe Invoice ID, the Invoice ID can be retrieved from the Stripe Dashboard**
* Retrieve the Invoice ID from the Stripe Dashboard.
5. **Create a charge using the Stripe Invoice ID, the Invoice ID can be retrieved from the Stripe Dashboard**
* Retrieve the Invoice ID from the Stripe Dashboard.
 * Use the [Create a Charge endpoint](https://docs.hel.io/reference/charge/create) with the following request:
```bash JSON theme={null}
{
"paymentRequestId": "689d87f67fe752dc0d274d0e",
"stripePaymentDetails": {
"invoiceId": "in_1RvvbyRrrfLyKJ52a3DSMF5c"
}
}
```
6. **Track Payment in Stripe**
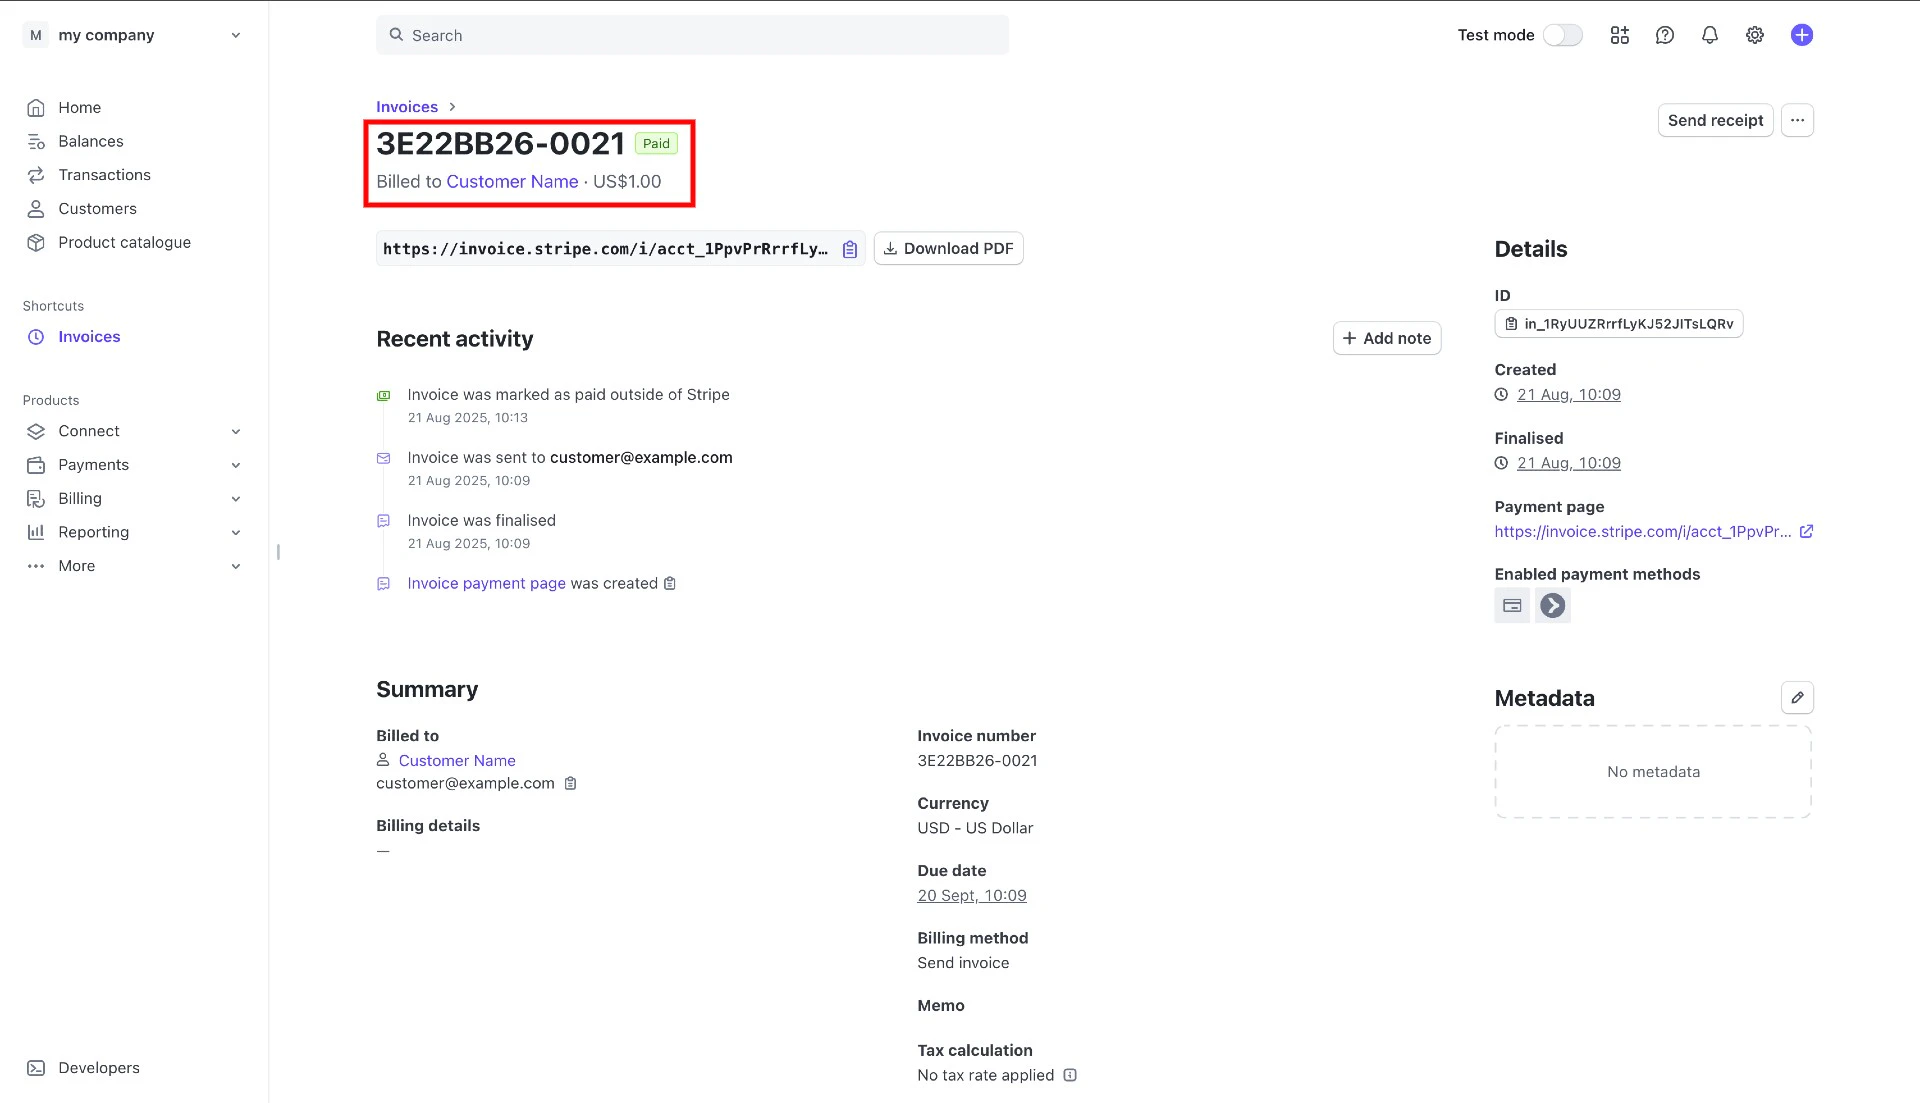
Once the customer completes the transaction, the invoice will be reflected as **'Paid'** in the Stripe Dashboard.
* Use the [Create a Charge endpoint](https://docs.hel.io/reference/charge/create) with the following request:
```bash JSON theme={null}
{
"paymentRequestId": "689d87f67fe752dc0d274d0e",
"stripePaymentDetails": {
"invoiceId": "in_1RvvbyRrrfLyKJ52a3DSMF5c"
}
}
```
6. **Track Payment in Stripe**
Once the customer completes the transaction, the invoice will be reflected as **'Paid'** in the Stripe Dashboard.
 ***
***