No Code
Get started on MoonPay Commerce and launch crypto payments in minutes
Getting Started
- Log into moonpay.hel.io or moonpay.dev.hel.io with an email or wallet, then use Settings to finish your profile, set up wallets, and invite team members.
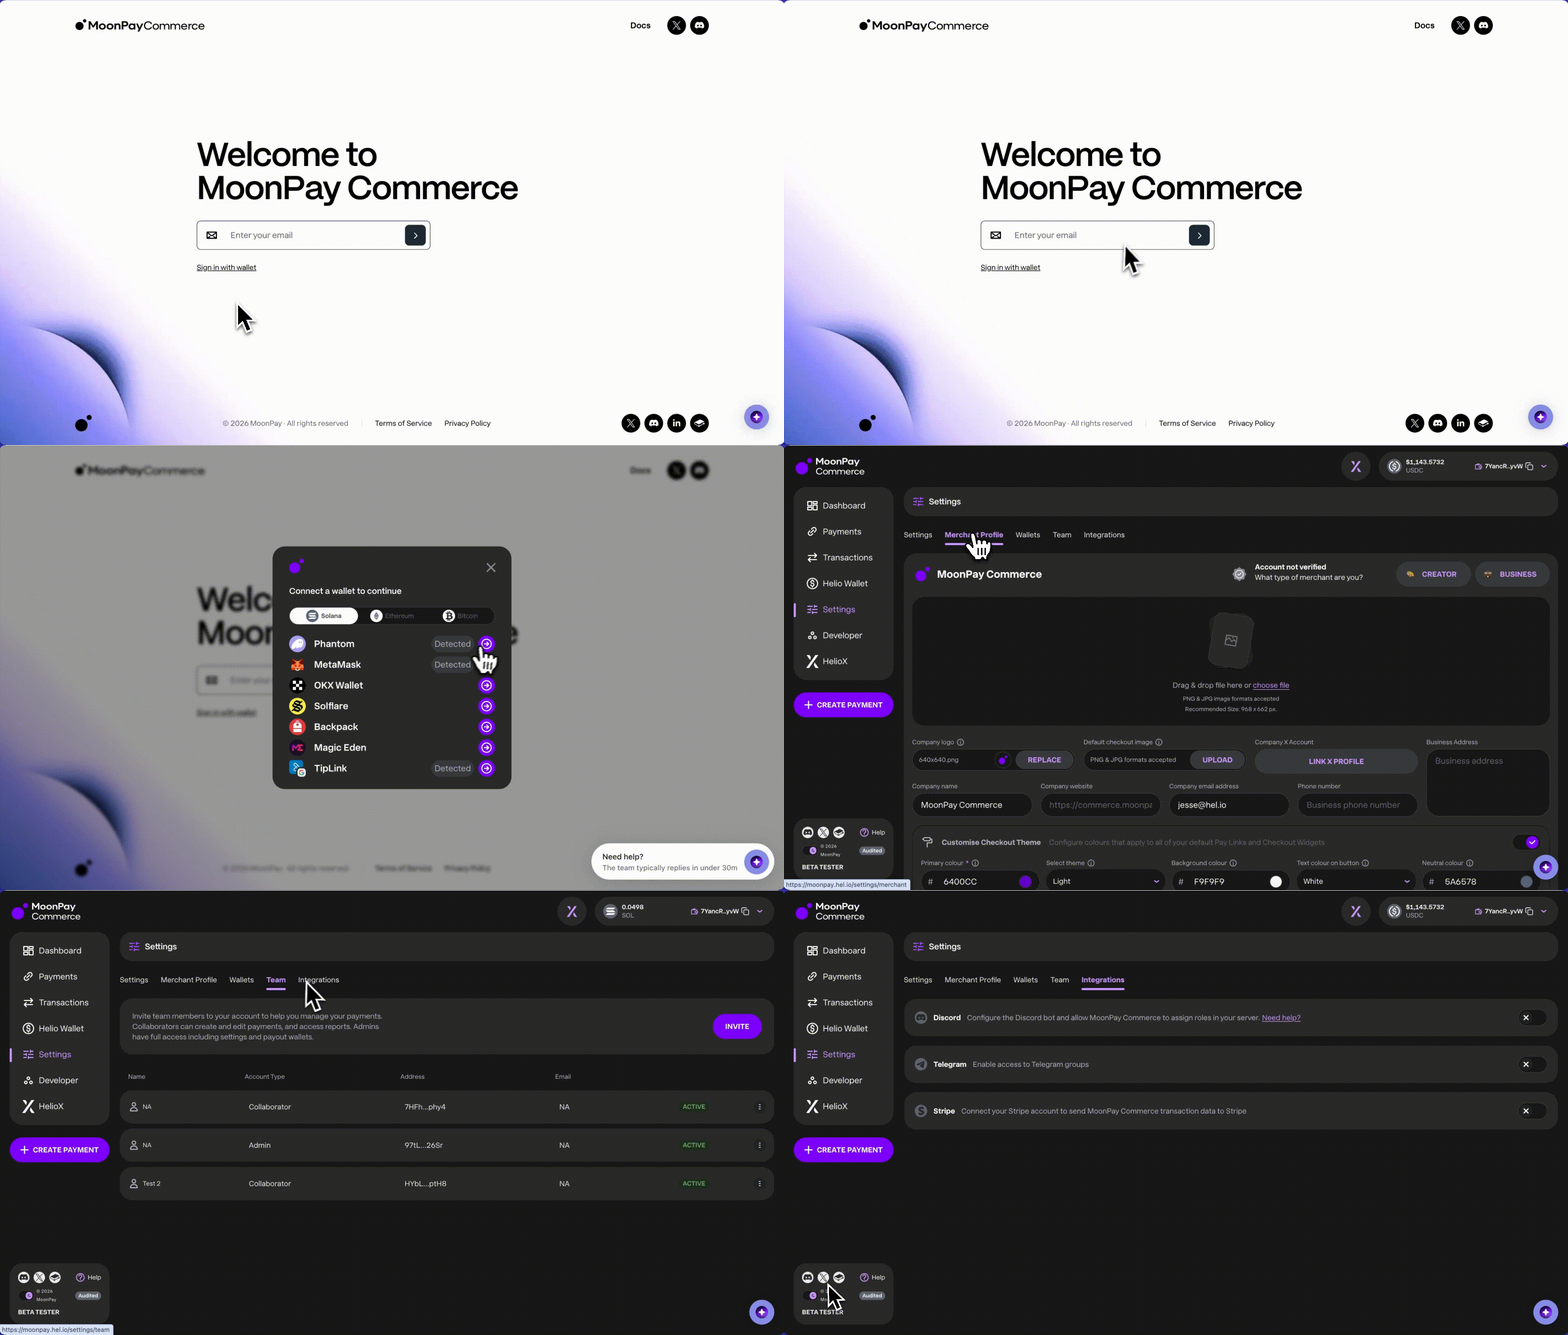
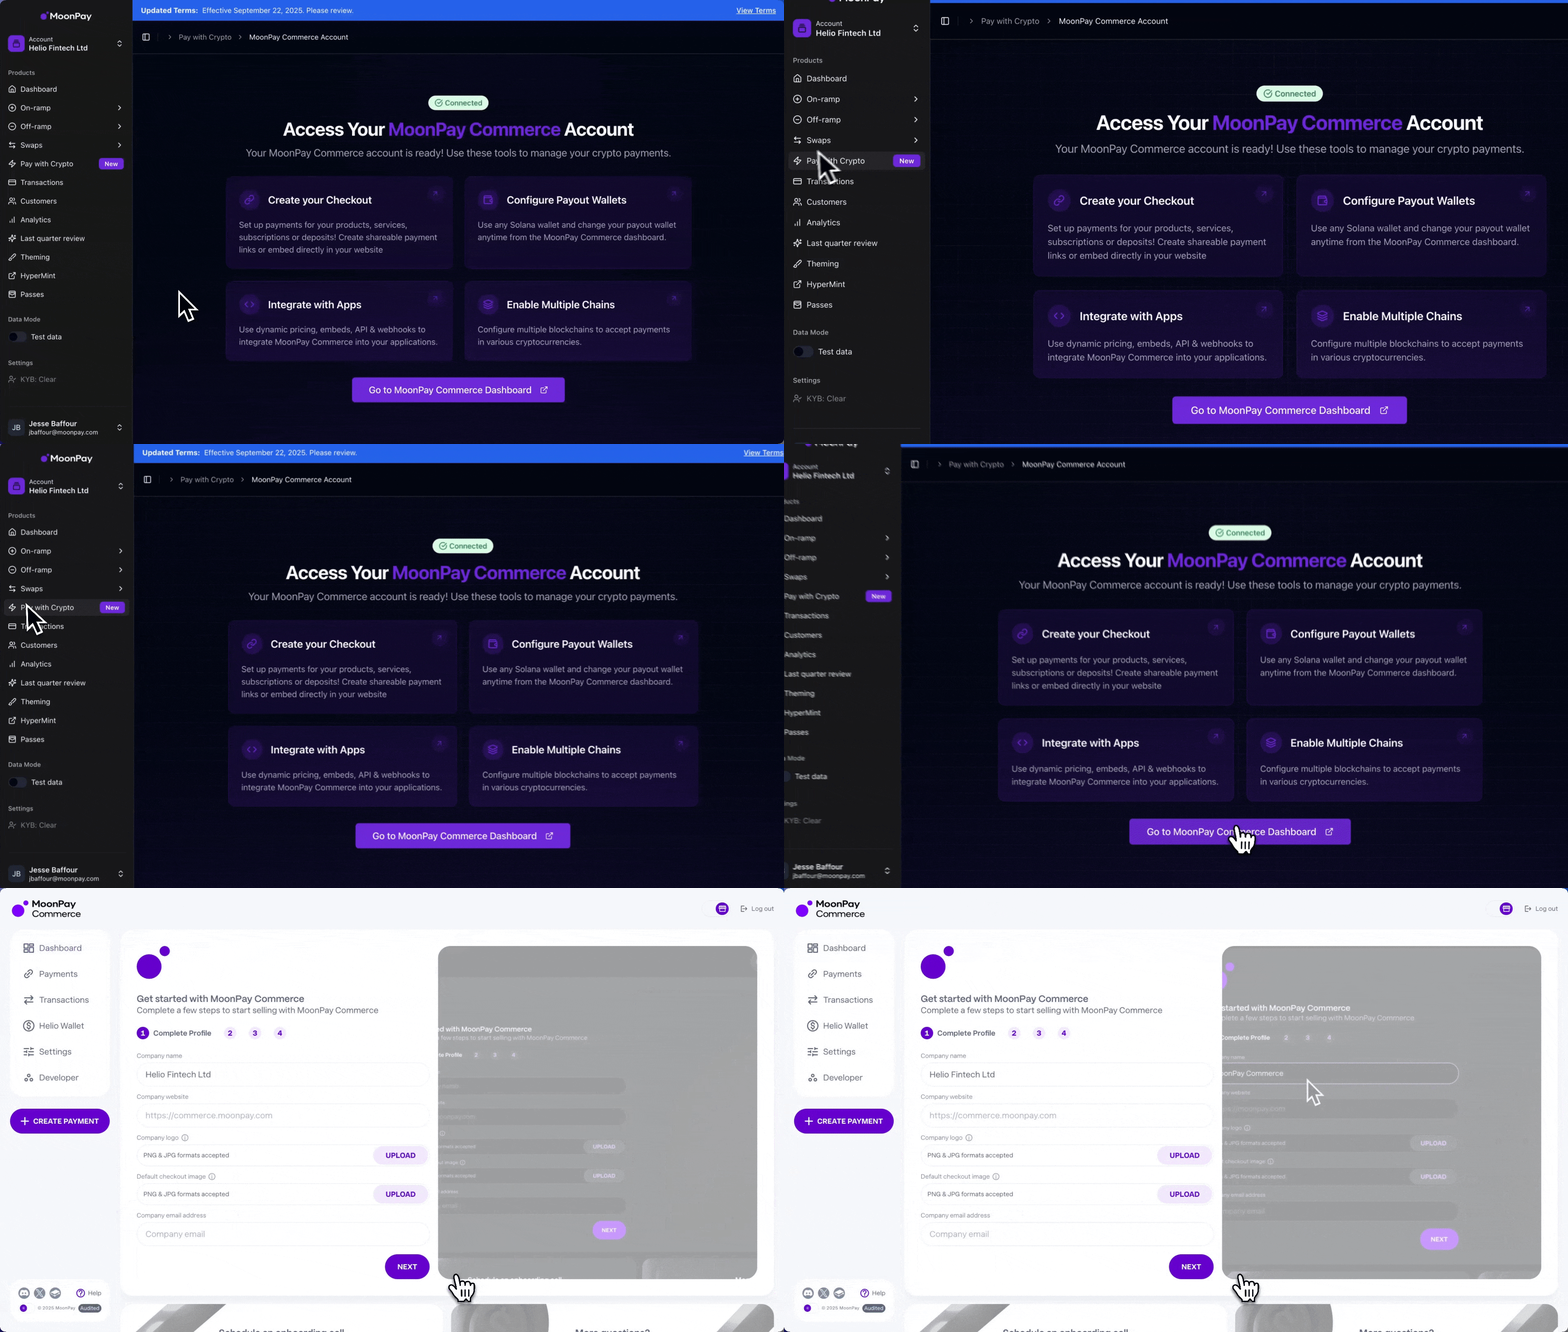
- If you're an existing MoonPay customer, Log in to the MoonPay Dashboard and select Pay with Crypto > Go to MoonPay Commerce Dashboard. Your account and existing KYB data will sync automatically.
Embedded Wallet
If you sign up via email, we automatically create an embedded wallet for you. You don’t need a browser extension, seed phrases, or an existing wallet, making onboarding seamless and enabling instant access to Web3 apps.
For users who previously used the Helio wallet, the new login flow uses a different wallet setup. To move funds from your existing Helio wallet, visit https://legacy.hel.io/ and follow the transfer steps.
Create Payments
MoonPay Commerce supports four payment types:
-
Pay Links - MoonPay hosted checkout page
-
Checkout Widget - embed payments in your app
-
Deposits - accept any crypto inside your app
-
Subscriptions - recurring payments
Pay Link Creation Flow:
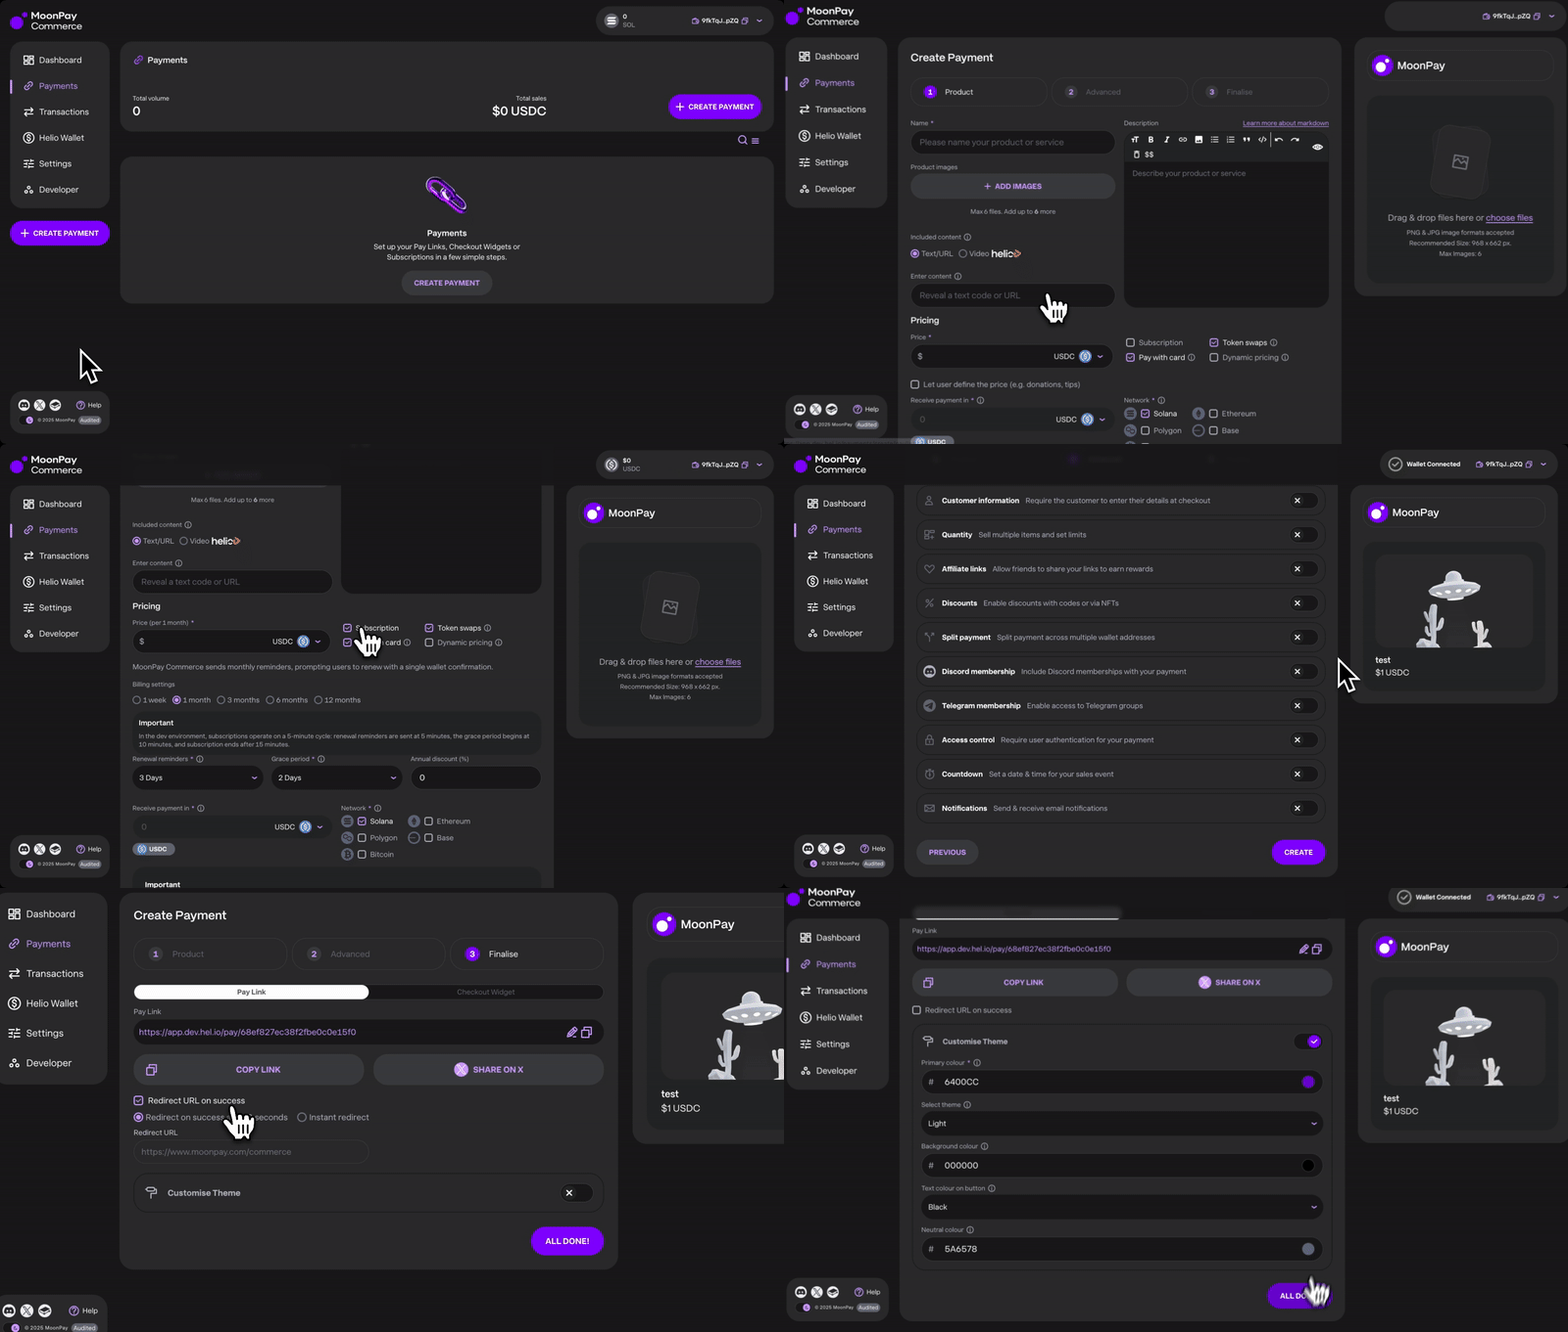
- Set product details: name, price, payout wallets, networks, card payments, swaps, and dynamic pricing.
- Subscriptions include billing intervals (weekly, monthly, quarterly, biannual, yearly), renewal reminders, grace periods, and annual discounts.
- Token swaps: allow customers to pay with any supported token while you receive USDC (0.25% conversion fee). Can be configured via the UI or the API.
- USDC on Solana only: all payments are converted to USDC on Solana.
- USDC on Base & Solana: Solana payments → USDC on Solana, EVM payments → USDC on Base.
You can only receive funds on EVM networks like Arbitrum and BNB Chain when Token Swaps are enabled. If Token Swaps are disabled, you can’t receive directly in these currencies.
- Advanced options: affiliate links, discounts, split payments, Discord/Telegram memberships, and gated payments.
- Final customisation: pay link theme (light/dark mode, colors), success redirect URL.
Managing Payments
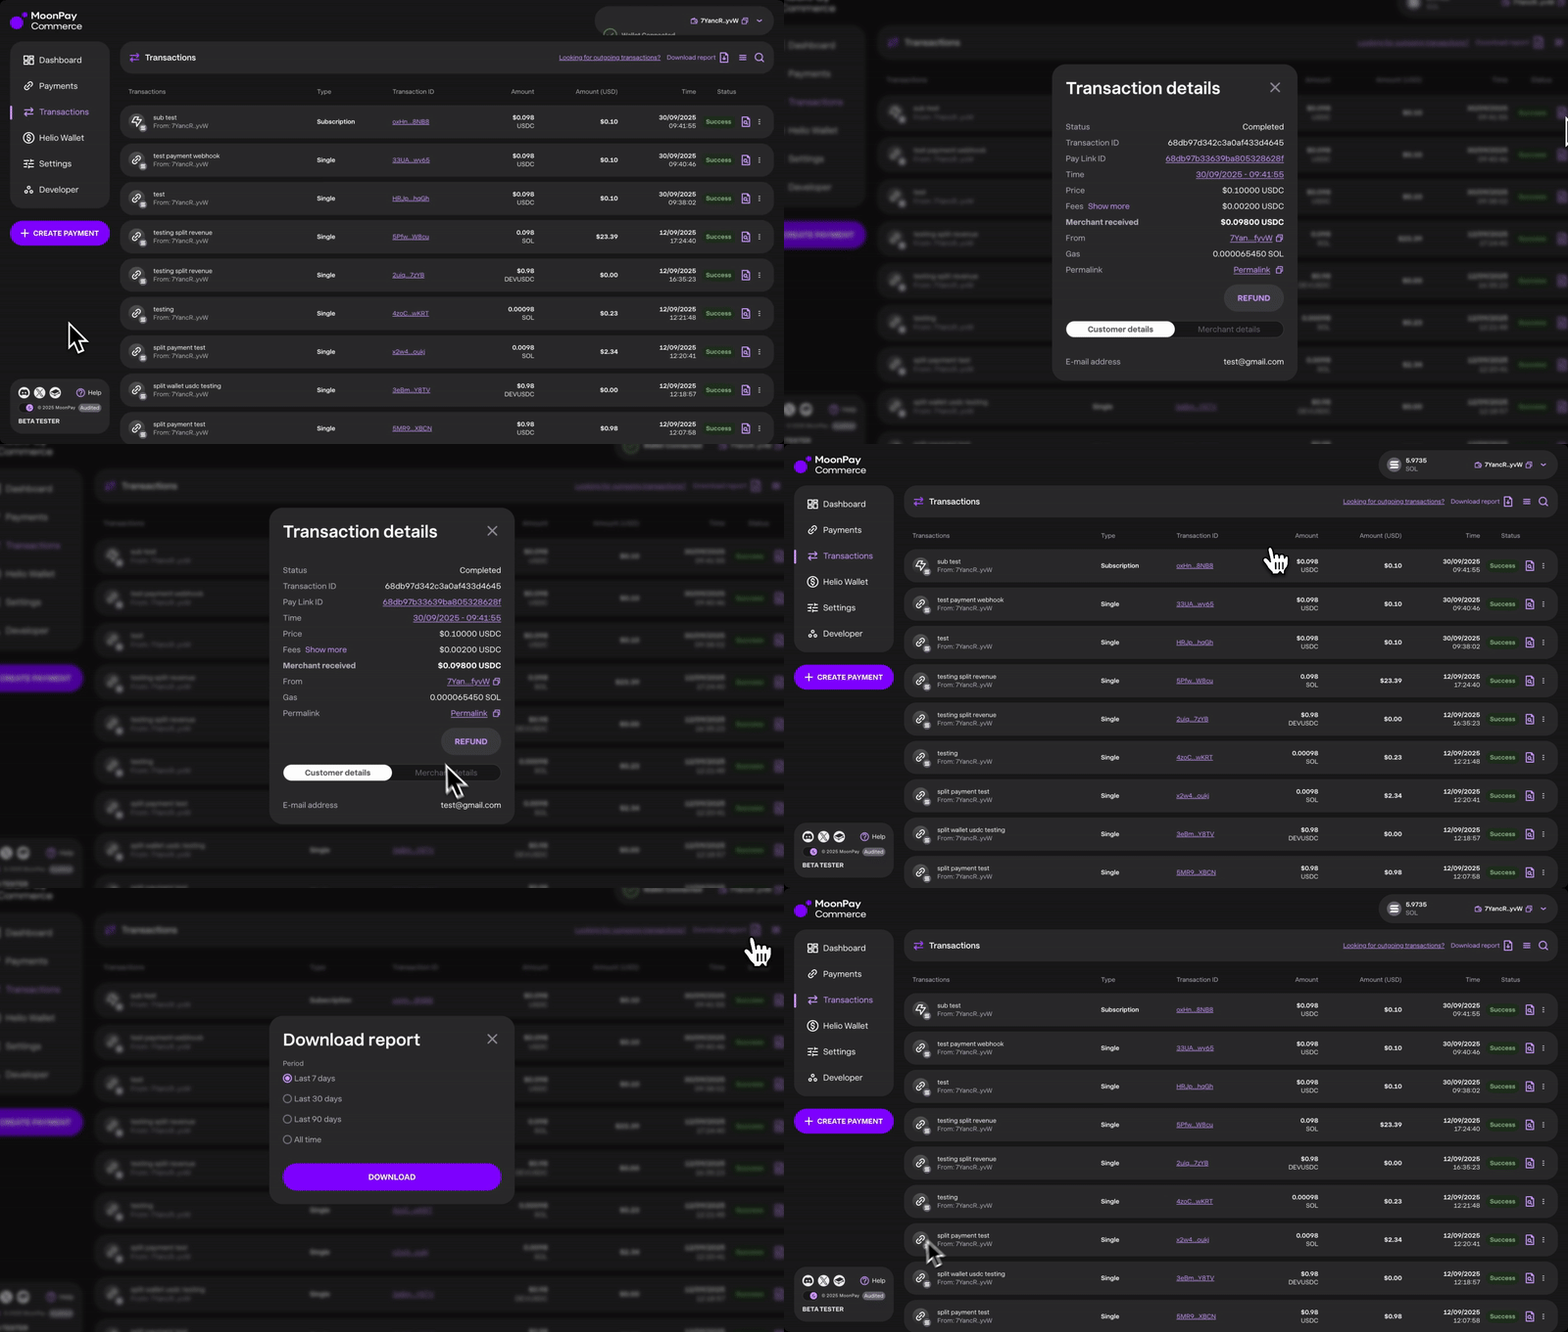
- All transactions appear in the dashboard under the Transactions tab. Each record shows the type of payment (single, subscription, or refund), transaction ID, amount, time, and detailed information.
- From here, you can also issue refunds when needed.
- For reporting, all transaction data can be exported as a CSV file.
Updating Your Payout Wallet
If you need to change the wallet that receives payments:
- Go to Settings → Wallets in your Helio Dashboard.
- Add a Linked or Payout Wallet.
- When creating a payment (Step 1 of the payment creation flow), you can choose which wallet will receive the funds for that specific payment.
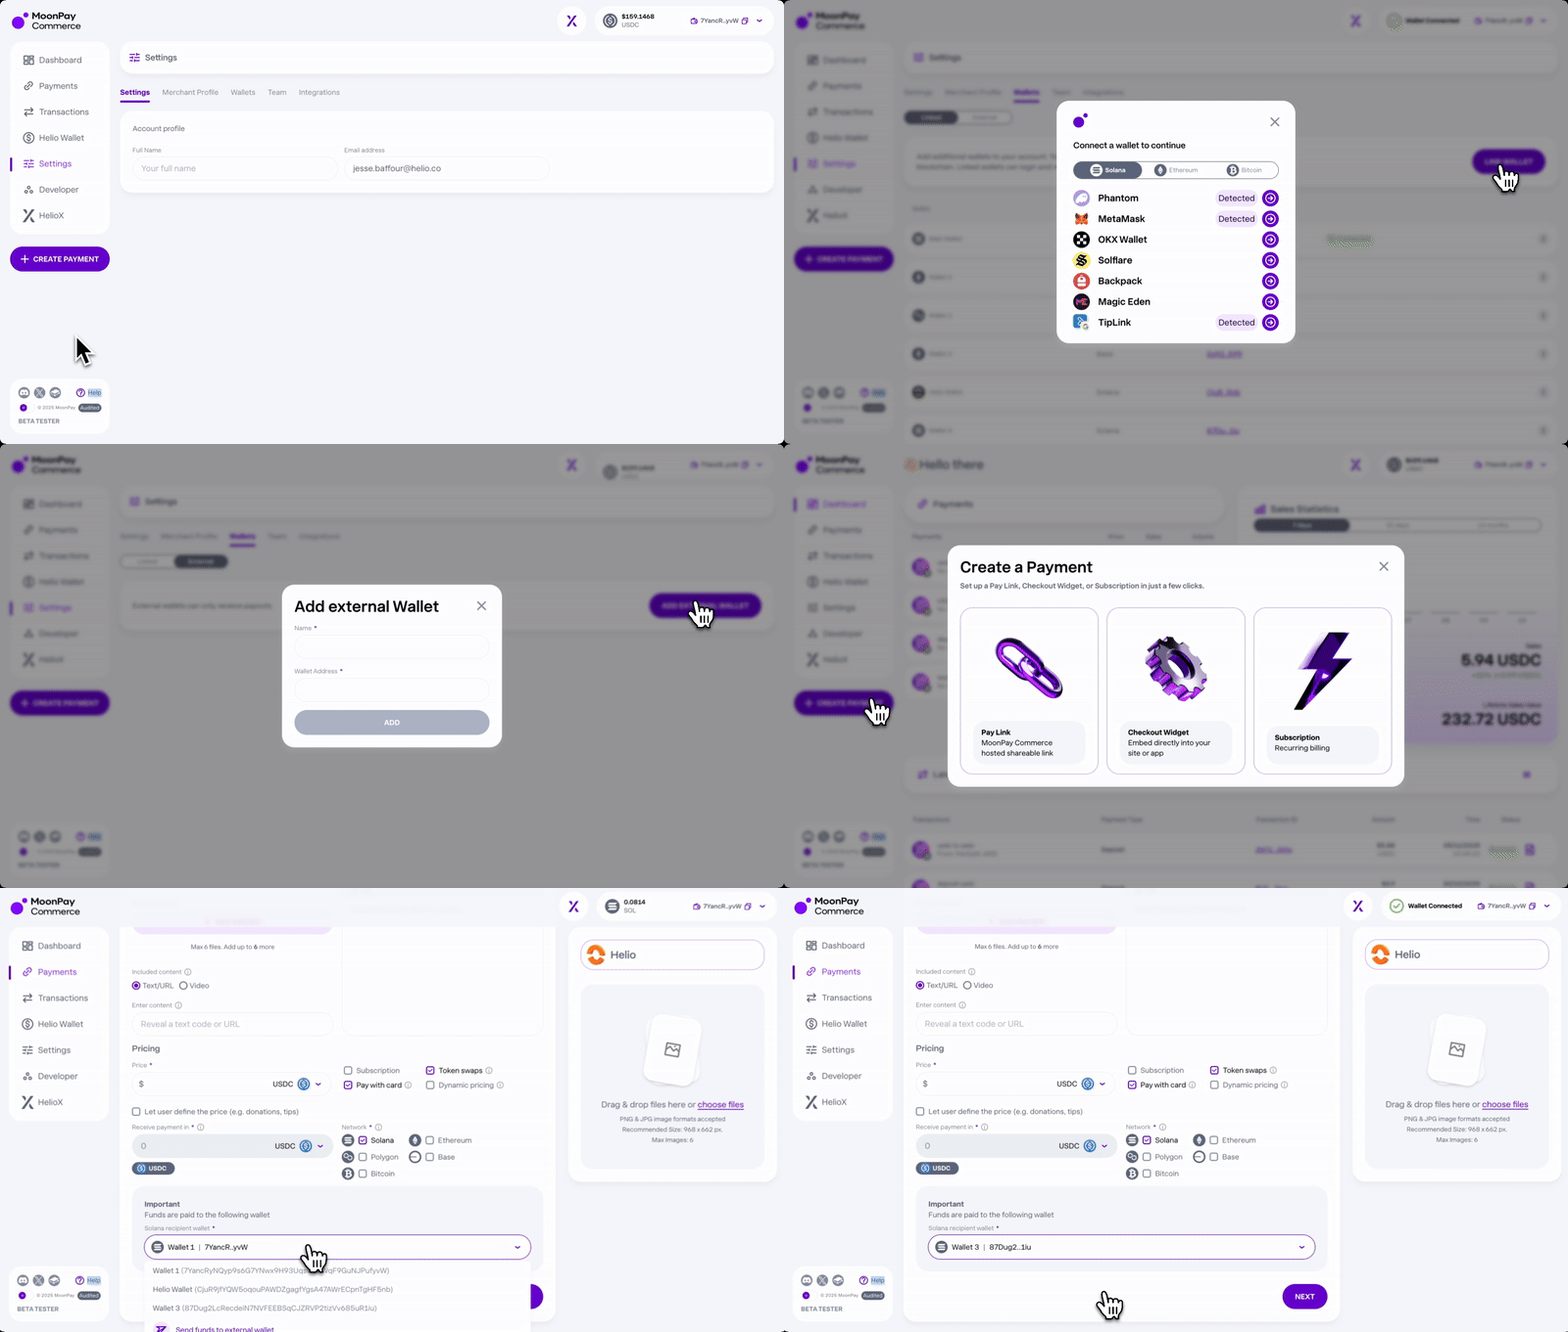
Note: Your main wallet is used as the default recipient for all payments unless another wallet is explicitly selected during payment setup.
No Code Integrations
MoonPay Commerce also makes integration simple with out-of-the-box options, including:
Updated 3 days ago
